Thursday, July 17, 2014

Hello Sea


Hi, Crafters!
I hope you all are having a really good summer.
We haven't been to the beach yet, 
but I'm sure we'll make it there at some point,
even if it's just for a day trip.

Sometimes I make things and they just don't look
too appealing to me, but everyone likes different things,
so I'll post it anyway hoping someone out there in blogland
will like it.

Today's project I absolutely love.

I used the Print 'n Cut feature for the Cameo.
This is something I'll be doing for the next 2 Thursdays.
Just a little Print 'n Cut series.

  • Silhouette ID# 59519 (little girl with pinwheel)
  • My Creative Time stitched ocean wave die & Scalloped and Stitched Circle dies
  • Cardz TV Stamps "Summer Fun" for sentiment in sunshine
  • Craftin Desert Divas "Say it Big" stamp set
  • Timeless Twine "Kraft Brown"
  • Silver brads to adhere the pail handle
  • Stampin' Up tulle
  • Bazzill cardstock
  • Tim Holtz Walnut Stain
  • Sand is hand torn
  • Foam squares to adhere little girl for dimension (Royal Castle Shoppe)


Thanks for stopping by today.
See you tomorrow.
:) Janis

Submitted:
Cute Card Thursday - fun in the sun
4 Crafty Chicks - the great outdoors
Penny's Paper Crafty - anything goes
Crafty Girls - anything goes
Craftin Desert Divas - summer
Die Cuttin Divas - just beachy
Shopping our Stash - something I use a lot (metal dies)
Dream Valley - sea or beach
Little Red Wagon - vacation

Wednesday, July 16, 2014

Happy Birthday Chalkboard Easel Card (and some crafting bloopers)


Hi, Crafters! Welcome to my blog.
Happy you stopped by today.

Do you ever have one of those days when you want to make something for a certain theme, but you can't concentrate on what you're doing? I had one of those days yesterday.
I decided to make a whompy cake. I've seen it in the Silhouette store and loved it. My friend, Nana, made one last year, and I loved it. I tried to make it yesterday, couldn't concentrate, didn't cut the layers in the colors I meant, put it together wrong, put it together again the right way, and it still just didn't look good enough for me. It's a combination of errors.  Want to see?


 That's not right.

 Better, but still not very good.


 Oopsie. It fell in the trash can.

Then I saw the paper lantern and thought how fun! I could make a bunch of these and string them up from ceiling in my craft room. Wouldn't that be festive, fun, and unexpected joy? It's a cute idea, but the papers I chose didn't do anything for me once I got it put together. I left it outside on the front porch to enjoy nature by itself. Want to see that too?


So anyway, I'll keep trying to come up with something. Some days are like that. You don't get anything done, but feel like you've spent all day trying. And then some days I have 3 projects done before 8 o'clock in the morning. Go figure.


Back to our regularly scheduled post...............

Today and the next 2 Wednesdays,
I'll be showing you Easel cards created with
Lori Whitlock files.
They are basically all the same card base,
but decorated with different themes.

Today's Chalkboard Easel Card theme is Birthday.


Silhouette ID# 62415 (Lori Whitlock Birthday Chalkboard Easel)
Hero Arts white ink pad
Craftin Desert Divas "Say it Big" stamp set

See you tomorrow.
:) Janis

Submitted:
613 Avenue - anything goes with optional shaped card
Crafty Girls - inspired by a song (does Happy Birthday count?)

Tuesday, July 15, 2014

PDE #14: Food for Thought


We are in the middle of a 
great challenge
over at

The theme is.....


Add a Tag to your project or Make a Tag

I decided to use another apple box cut from the
Silhouette Online Store
ID# 46913.


Here is my project!


  • Silhouette Online Store ID# 49613
  • I love the apple core tag that came with this file!
  • The tag is adhered with foam squares for dimension (Royal Castle Shoppe)
  • Some twine and craft thread from stash
  • Cardz TV Stamps "Foodie Punnies"


Thanks for stopping by today!
Be sure to pop over to
and link up your project for this challenge.

:) Janis

Submitted:
613 Avenue - anything goes
Make My Monday - end of term
Fusion - used red from the photo inspiration (see below)
Totally Gorjuss - tag on your project (apple core is tag)

Monday, July 14, 2014

Butterfly Party Basket


Hi, Crafters!

I love when you come to visit my blog
and see what I'm up to!

Today I have a very beautiful, festive
butterfly box.

This box can be used as decoration,
home decor, party table centerpiece,
party favors, wedding favors, etc.
The ideas are limitless.


I have photos showing this with
wedding rice bags
and with
party favor M&M bags.
Fill it up with any items you'd like.


  • Silhouette ID# 56784 (Lori Whitlock file)
  • Brushed brass brad by Recollections
  • Pattern papers from K&Co.
  • Tulle from Amazon

Thanks so much for visiting.
See you tomorrow.
:) Janis

Submitted:
Pinspirational - photo inspiration (see below)
Colour Q - color ch (see below)
Divas by Design - things with wings


Sunday, July 13, 2014

Create a Shadow using the Offset Feature (tutorial)


Before I get to today's project I want to thank you all so much for the many nice comments on my blog yesterday and on Facebook about how much you enjoyed my little tutorial of how to use the Print 'n Cut feature on the Cameo. I had no idea it would get such a grand response.  Therefore, today, I have another little tutorial for you on how to create a shadow for any object in the Cameo software.  If there is something else you'd like more information on or a small tutorial (and I know how to do it), just ask, and I'll see what I can do. Again, thank you so much. The comments made my day. I'm glad I was able to help so many you.

Ready to see my project?
Lots of pictures coming up showing step by step 
in the Silhouette Software of how I created
my own shadow for an image.
I'm no expert.
I only use a small percentage of what this
powerful program can do.
You may know an easier, better way to create
a shadow, but this is how I did it for this project.

First, here is my finished card.


Now......... all the fun steps to create the shadow......


Select an image to use.

I like to also drag and drop a photo of the image completed so I have a guide.


I colored all the parts with the eye dropper color match.
Then I "assembled" the parts layering them
just like I would after cutting my papers.
I copy and pasted my image before the next step!


Then I welded them and this created a solid outline of the exact finished image.
I use this when adhering my pieces together as a guide.


Click on the OFFSET button.
Select item to offset.
Click on offset.


Adjust distance to your preference.
Choose corner or rounded.
Click apply.


Take apart the layered pieces and lay them out on your mat for cutting.


Cut and assemble your pieces.


Layer on your shadow.


Add item to your project.


Voila!
'Tis complete.


  • Silhouette ID# 57089 (Alice in Wonderland)
  • Bazzil solid papers
  • My Mind's Eye "The Sweetest Thing" pattern papers
  • Craftin Desert Divas "Be Inspired" for sentiment
  • foam squares to adhere Alice for dimension (Royal Castle Shoppe)
  • Timeless Twine "Autumn Splendor"

Thanks for stopping by today!
See you again tomorrow.
:) Janis

Submitted:
Cute Card Thursday - pretty papers
Sister Act - anything goes
Inkspirational - photo inspiration (see below) (I chose to use the colors blue & yellow from the photo on this one)


Saturday, July 12, 2014

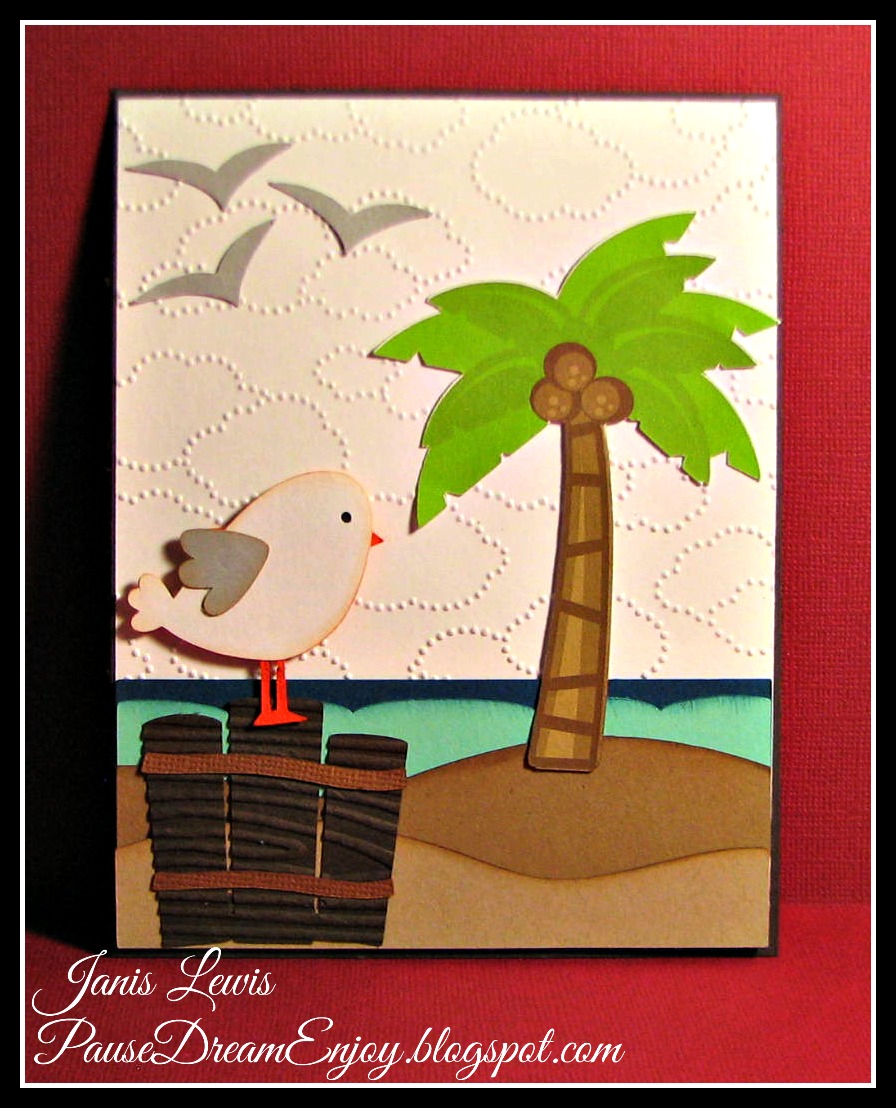
Print-n-Cut Beach scene


My first thought was to create a CAS (clean and simple) card. 
Yeah, that didn't happen. LOL 
But I love how this card turned out!


Most of the elements on this card are die cuts.
The palm tree is a PRINT-n-CUT on the card. 
Isn't it pretty?

Photo heavy coming up.

I decided to give you screenshots of each step to use the
Print-n-Cut feature.
Hope this helps you decide to give it a try if you've 
never used the Print-n-Cut feature before

Step 1:
Pull a file onto your Silhouette software virtual mat.
In this example I pulled Miss Kate Cuttables Beach Scene jpeg format.


Step 2:
Click on the TRACE button.
Click on Select Trace Area.
UNcheck High Pass Filter.
Change the percentage on the Threshold 
until the image you want is mostly yellow.


Step 3:
Click on Trace & Detach.
Move the image away from the rest of the stuff it left.
Delete all that stuff you don't want.
Re-size your image to meet your requirements
for your project.


Step 4:
Click on Page.
Click on the size of your paper you will print on.
Click on Portrait or Landscape.
Click on the size of your cutting mat.


Step 5:
Click on Registration Marks.
CHECK the box to Show Registration Marks
on your print out.


Step 6:
Click on SEND TO SILHOUETTE.
Or you can click on the printer icon.
If you click on Send to Silhouette, 
then choose to either
print
or
skip printing.
If you haven't printed yet, you'll need to do that.


Step 7:
After you have printed, 
simply place the paper on your cutting mat.
Insert into your Cameo.
Click Detect Automatically.


The Cameo will move around your mat 
to find the registration marks.
This is how it knows where the image is
and where to cut.
Click on Cut.
Voila!
Success!


  • Stampin' Up:
    • Cloud embossing folder
    • solid cardstock
  • Miss Kate Cuttables:
  • My Scrap Chick:
  • Foam squares to adhere standing seagull for dimension (Royal Castle Shoppe)
  • Some images inked around the edges with various inks and colors

Thanks for stopping by today!
:) Janis

Submitted:
Allsorts - anything to do with water
Inkspirational - photo inspiration (see below)


Creative Card Crew - masculine
Penny's Paper Crafty - anything goes

Friday, July 11, 2014

Cupcake Monster


Happy Friday, friends!
My birthday was last weekend (July 1), 
but I decided that it's okay to celebrate your birthday
every weekend of your birthday month, right? Right!
CUPCAKES!!!


I made this Monster Cupcake box especially for Mary's Cardz TV challenge, 

Cardz TV 3-D Designers Challenge #4 
Create a 3-D project for a Masculine Birthday. 

Now, I know what you're thinking. There are pink sprinkles on the cupcake that is supposedly for a Masculine birthday. But who doesn't love cupcakes no matter
what color is on them? Hopefully, Mary will give me a free pass on the sprinkles. If not, I can always take another picture of the Monster Cupcake box after I eat the cupcake. :)


  • Cardz TV Stamps "Sugar Rush"
  • My Creative Time Stitched Tag die and Teeny Tiny Greetings & die
  • Silhouette ID# 30338
  • Green ribbon from Walmart
  • Timeless Twine "Olive Green" 
  • Bazzill solid cardstock
  • Pattern cardstock from Hobby Lobby's "Cosmic Whammy"
About this Silhouette Cut.... I did cut some extra plain white cardstock to slip in the sides and back. The Silhouette cut came with the box pieces, but with the circles and arms cut out on each side and the back, it didn't look finished to me without some plain white pieces on the sides and back. Just my personal preference.

Thanks for stopping by. Enjoy your weekend!
:) Janis

Submitted:
Cardz TV - masculine 3D birthday
Crafting by Designs - July anything goes

SOUS: Going Somewhere

A new Die Cut challenge starts today 
over at Stuck On U Sketches! 
I hope you'll join us for this die cut challenge. 
Create any type of project 
you would like using our theme, 
GOING SOMEWHERE.
(anything that can go)


You can link up your project HERE


  • Silhouette Online Store 
    • Pirate Ship ID# 44760
    • Clouds & Waves ID# 11080
  • My Creative Time Stitched Teeny Tiny Tag die
  • All solid papers from Stampin' Up
  • Background sky paper from K&Co
  • Cardz TV Stamps "A Day at the Beach" for sentiment

Thanks for stopping by today to see what I'm up to.
:) Janis

Submitted:
The Paper Players - Let's go to the beach
Sentimental Sunday - red, white, and blue
Craftin Desert Divas - it's summertime
Creative Card Crew - masculine
Crafty Girls Challenge - anything goes
Inkspirational - photo inspiration (see below)


Thursday, July 10, 2014

Let the Good Times Roll!


Hi, friends!

I saw the Freshly Made Sketches current sketch this morning,
and I really wanted to play along, so here's an extra project to show you today.

For this card, I used several different "tools" the Cameo software provides. Believe me, I still don't know tons about what this powerful Designer Edition software can do, but I'm learning.

Features used:
* Print 'n Cut
* Stretch
* Weld
* Sketch Pens
* Release Compound Path


Here are some of the creation process details.......


Print 'n Cut:


I like to fill up a sheet when I'm using the Print 'n Cut feature.
I put the unused cuts in an envelope and save them for a later time.


Release Compound Path


I took this cut, Released Compound Path, Removed the "&" symbol,
then stretched the shape the way I wanted it.


Sketch

Then I turned OFF the cut lines and overlapped the Sketch music file changing my cut option for the music to Silhouette Sketch Pen. 


After the music printed, I moved the music off my mat, selected my image and turned ON cut lines and cut out the image.


Weld

I picked out some labels I liked, re-sized the one I wanted to use, created a rectangle the same width, and welded the 2 shapes together giving me lots of room for my stamped sentiment and a little room to slip this under the music cut file for card placement.  I also created an INTERNAL offset so I could have a shadow layer.


It was all really fun to play around with.
This may sound complicated and time consuming, but I promise you, it was easy and quick.


  • Pattern paper from Doodlebug Design "Hip Hip Horray" 6x6 pad
  • Cardz TV Stamps "Good Times"
  • My Creative Time Stitched Grass metal die
  • Silhouette ID#:
    • 39232 (set of 4 tabs)
    • 56724 (flagged banners)
    • 12899 (sketch music)
    • 23845 (print 'n cut hipster musician)
  • Ghost stamping sentiment - first stamped with Close to my Heart Lagoon ink and then again with Memento Tuxedo Black ink


Thanks for stopping by AGAIN today.
:) Janis

Submitted:
Crafting from the Heart - anything goes
Color Throwdown - color ch
Crafty Creations - let's party